Since the release of Microsoft SQL Server 2017, Microsoft has introduced the ability to execute Python code direct from within the SQL Server environement. Now my first question was why? Well over time I came to the conclusion that SQL Server is not always the best/only tool for the job and thus this feature allows us to perform more complex and complete functions for example string distance functions in SQL Server. We perform many of these on a daily basis like JaroWinkler, which works great except that I can do it even quicker in Python as it is a RBAR operation.
Lets start off by creating our input dataset, in most cases you would already have a dataset in mind for this. If that is the case you can skip the next 2 steps.
Note that I will pass my data(SQL Query) from SQL Server to Python using my_input_data, and OutputDataSet as my final output. You will need to know what columns and datatypes you will be expecting back from Python.
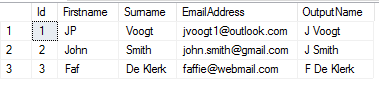
In this example we will use pandas to take the first letter of the Firstname and the Surname and combine them to create our OutputName column. This is just an easy example of how to perform string manipulation operations in Python
DECLARE@NewScriptNVARCHAR(MAX)SET@NewScript=N'
import pandas as pd
#Read Data From Input @input_data_1
df = my_input_data
#Perform String Manipulation
df["OutputName"] = df.apply(lambda x : x.Firstname[0] + " " + x.Surname, axis=1)
#Assign pandas.DataFrame to our spesified OutputDataSet
OutputDataSet = df
'
EXEC sp_execute_external_script
This is now where it all comes together, We indicate that we want to use Python, provide the input script, the input data and specify what the expected output will look like.
EXECsp_execute_external_script@language=N'Python',@Script=@NewScript,@input_data_1=N'SELECT * FROM Employees',@input_data_1_name=N'my_input_data'WITHRESULTSETS((Idint,Firstnamevarchar(50),Surnamevarchar(50),EmailAddressvarchar(50),OutputNamevarchar(50)))
Results
Conclusion
Disclaimer: Content is accurate at the time of publication, however updates and new additions happen frequently which could change the accuracy or relevance. Please keep this in mind when using my content as guidelines. Please always test in a testing or development environment, I do not accept any liability for damages caused by this content.
Working with big datasets has introduced many more technologies for the average Data Analyst to learn and understand. I have recently started to work more in Azure Databricks to enable our processes to be considered more optimized. For example, I do a lot of string distance calculations on my datasets and, SQL Server or even Azure Synapse is not always the best solution for this. In the past, we created these functions as CLR’s and processed the data directly in SQL, but in time our data grew even more and, this became harder and harder. Moving this workload to Azure Databrick saved us hours of processing time, but introduced a new technology barrier that we had to learn and overcome.
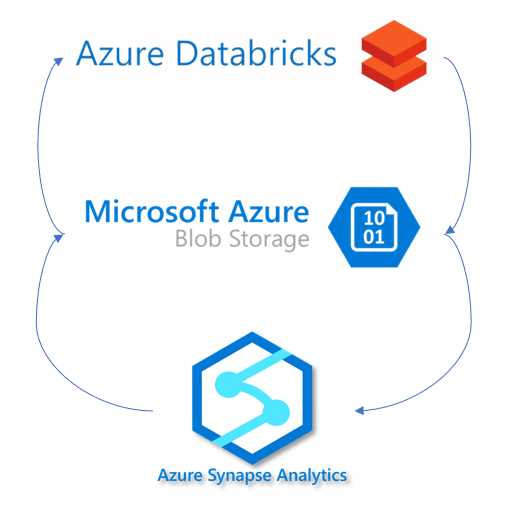
Below I go through the basic outline of what is required to load data from Azure Synapse to Azure Databricks and push down to Synapse again once done.
Configure your BLOB storage access, this can be achieved in many other ways. Read more here
Create the JDBC connection string and BLOB connection string
Read the data from Azure Synapse into a Spark Dataframe using spark.read function
Write transformed data back into Azure Synapse with spark.write
Disclaimer: Content is accurate at the time of publication, however updates and new additions happen frequently which could change the accuracy or relevance. Please keep this in mind when using my content as guidelines. Please always test in a testing or development environment, I do not accept any liability for damages caused by this content.
I found that some of us repeat the same processes over and over again where other people might never need to perform a specified task which I would consider basic, thus I want to share with you how I approach removing of duplicate records in my data. Now if you are lucky enough that the entire row is a complete duplicate then you can just go ahead and slap a DISTINCT in your query and your problem should be gone. You will have to be mindful of the limitations here as it doesn’t support long text fields as per Microsoft Docs
I Prefer to rather decide what makes my records distinct and act accordingly.
Remove Duplicate Records for Reporting
Description
When removing duplicates you will have to decide what makes your record unique, could it be a merchant id or even a social security number? I Like to go with the CTE and ROW_NUMBER approach when removing duplicates from me datasets. The only drawback here is, if you do not want the new column you will have to specify the required columns when you select from the CTE
Sometimes you are not just removing duplicates for reporting purposes and you want to delete the duplicates from the actual table. SQL Server allows this awesome trick where you can write your logic in a CTE and then DELETE records based on the CTE logic as per the below example. Here I delete all records that occurred more than once.
Disclaimer: Content is accurate at the time of publication, however updates and new additions happen frequently which could change the accuracy or relevance. Please keep this in mind when using my content as guidelines. Please always test in a testing or development environment, I do not accept any liability for damages caused by this content.
I am sure that you do not want to read my whole back story on why I decided to write about how to present directly from your Jupyter Notebooks. Thus I think we should jump right into it.
Opinions does matter
In my honest opinion there is 3 main ways on how to present your Notebooks, which we will cover in this article.
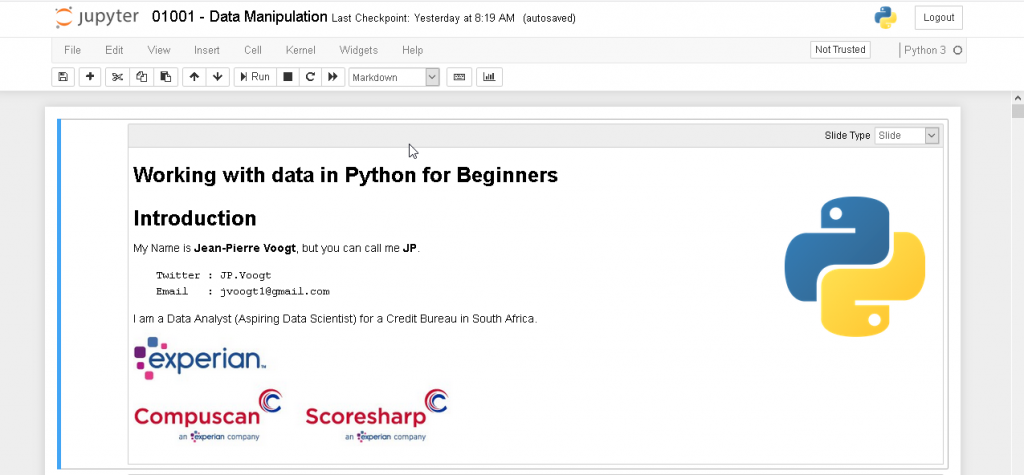
Using your notebook in its normal form
Using the built in Notebook to presentation converter
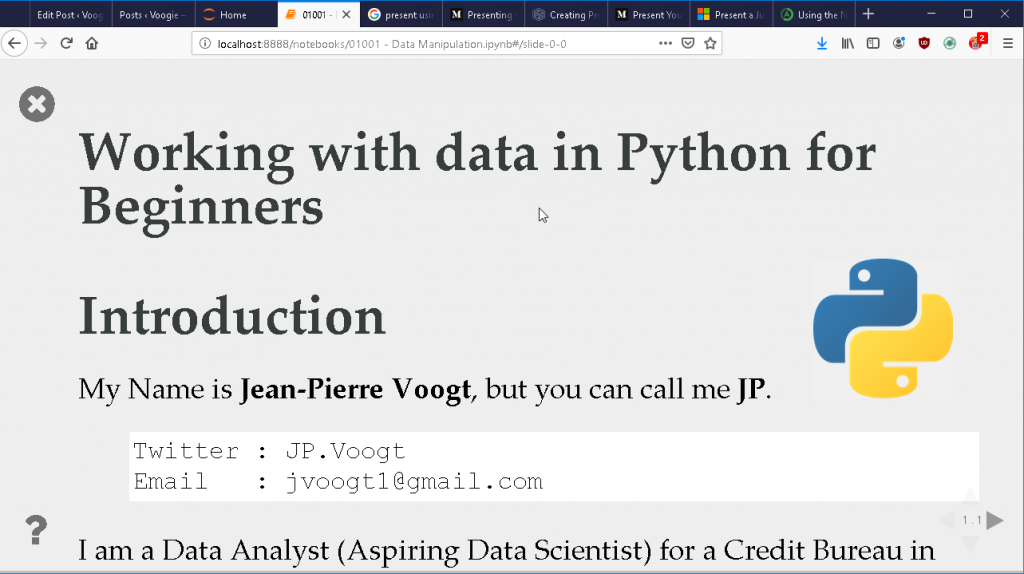
RISE which uses reveal.js framework to allow us to instantly switch to presentation mode with additional customization’s
Which one is better
“It depends” – every IT professional’s favorite words ever.
No, but seriously it really does depends. I have used all of the above methods to present the same notebook to different audiences in this last few weeks. Leaving the notebook in its natural form allows you to show your code and execution times of each segment.
While using the built in converter makes for a very safe presentation, it does take some time to get the layout just right of the slides and fragments. but once this is defined you can run a simple Powershell command to convert your notebook with results to an HTML file. I really like this as I know I do not have to run this code again in front of an audience and risk potential failure.
RISE brings together the best of both worlds, it allows you to run code blocks while in presentation mode. RISE also allows you to use more of your screen real estate as with the built in method you are limited to a predefined block size.
Presenting Directly from your Notebook
This works well for a technical audience, When they are more interested in your code and results rather than the flash of a good PowerPoint Presentation.
Executing the above command in Powershell/CMD creates a HTML version of your Notebook. I like to do this and store the HTML copy on my phone before a presentation. This will allow me to have a disaster plan in case something happens to my laptop during or before my session
Go over to Matthew Speck’s article for a detailed setup: link
RISE
This is by far my favorite method of presenting a Notebook as it combined the best of both worlds. It is built on the Reveal.js framework. RISE allows you to present your Notebook in a PowerPoint format, with the ability to still execute your code blocks in the presentation mode.
Disclaimer: Content is accurate at the time of publication, however updates and new additions happen frequently which could change the accuracy or relevance. Please keep this in mind when using my content as guidelines. Please always test in a testing or development environment, I do not accept any liability for damages caused by this content.
Let us jump right in, the first thing that we need to know is that the APS/PDW is not like a normal SQL Server instance. It does look and feel like one, but it has its own little quirks. One of the big ones is that it is not as straight forward to see current assigned User Permissions as what one would expect.
Disclaimer: Content is accurate at the time of publication, however updates and new additions happen frequently which could change the accuracy or relevance. Please keep this in mind when using my content as guidelines. Please always test in a testing or development environment, I do not accept any liability for damages caused by this content.